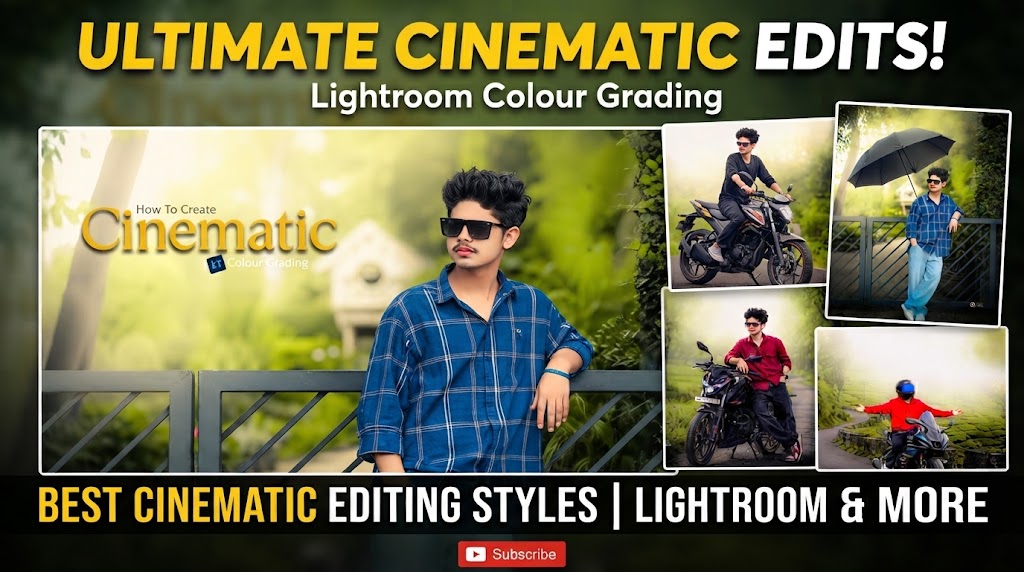
Master Ultimate Cinematic editing with free light-room presets. Easy color grading tutorial to make your photos look cinematic and professional.
Cinematic Editing and Trending
Ultimate Cinematic editing is the art of making your photos look like they came straight out of a movie. The style uses deep shadows, soft highlights, warm skin tones, and cool backgrounds to create mood and depth. In 2026 this look is trending on Instagram, YouTube thumbnails, and portfolio work because it instantly makes ordinary photos feel premium. People love cinematic edits because they tell a story. You don’t need a SLR or expensive camera. With just your phone and light-room Mobile you can achieve the same professional look. The key is color grading. Once you understand the basics, you can apply it to portraits, travel, bike shots, and nature photos just like in your thumbnail.
light-room Mobile is free and powerful. Unlike other apps, it gives you full control over curves, HS, split toning, and color mix. That control is exactly what you need for cinematic edits. The mobile version also supports deg presets which means you can save your style and apply it to hundreds of photos in one tap. It works on Android and iPhone, and it syncs with desktop light-room. For beginners it’s the safest tool because Adobe provides regular updates and no copyright risk. You don’t have to download cracked software. Everything you need for pro color grading is inside light-room Mobile. Plus, it exports in high quality for social media without losing details.
Ultimate Cinematic Before Editing
Before we start, keep 3 things ready. First, a good quality photo with decent light. Golden hour photos work best for Ultimate Cinematic tones. Second, light-room Mobile installed from Play Store or App Store. Third, free deg cinematic presets. You can create your own or download free packs from trusted creators. Always avoid pirated paid presets because they can contain malware. Open light-room, import your photo, and duplicate it so you have a backup. Set your workspace to full screen for better control. Now you’re ready to apply color grading. Don’t worry if your first edit looks flat. Cinematic style takes a few steps to build, and we’ll go through each one slowly.

The Tone Curve is the secret of Ultimate Cinematic edits. Go to the Curve panel and make a subtle S-curve. Lift the black point slightly up to create faded blacks. This is called the “film look”. Then pull the highlights down a little to avoid harsh white spots. In the rob curve, add a tiny point in the middle and lift it. This adds softness. Movie editors use this technique to reduce digital sharpness. Don’t overdo it or your photo will look gray. The curve should be gentle. Once you get this look, save it. This curve alone will make your bike and portrait photos feel more dramatic and closer to cinema color science without any extra filters.
Basic Adjustments for a Ultimate Cinematic
Start with the Light panel. Lower the highlights to -30 and raise the shadows to +20. This creates the soft contrast seen in movies. Set whites to -10 and blacks to -15 for depth. Next, adjust temperature. For Ultimate Cinematic skin tones keep it slightly warm, around +5 to +10. Tint should be neutral or +2 magenta. Exposure depends on your photo, but don’t overexpose the sky. The goal here is balance. These basics prepare your image for color grading. If you skip this step, colors will look unnatural later. Take 30 seconds to get this right. A good base makes the rest of the editing 10x easier and more professional.

Now open color Mix or HS. For Ultimate Cinematic skin, focus on Orange and Red. Reduce Orange saturation to -10 and increase luminescence to +10. This makes skin glow without looking orange. In Red, add +5 saturation for lip and cheek tones. For the background, adjust Greens and Blues. Lower Green saturation to -15 for a moody forest look. Increase Blue luminescence to +15 to make sky and shadows pop. This separation between warm subject and cool background is what makes photos cinematic. Play with these sliders slowly. The goal is not to change reality but to enhance mood. When skin and background are balanced, your edit instantly looks professional.
Effects, Grain and Vignette for Depth
Split toning adds color to shadows and highlights separately. Go to Effects > Split Toning. In highlights, choose a warm tone. Set hue to 40 and saturation to 10. This gives golden movie highlights. In shadows, choose a cool tone. Set hue to 220 and saturation to 10. This gives blue contrast. Balance should stay near 0. This warm-cool contrast is used in Hollywood films. It makes your subject stand out. Don’t use high saturation here or it will look fake. Subtle is better. After this step, your photo will start to feel like a movie poster. This is the step that most beginners skip but pros never do.
However, most people make 5 big mistakes in cinematic editing. First of all, they over-saturate the colors. Keep in mind that Ultimate Cinematic means muted tones, not neon. Secondly, they use too much clarity. As a result, the skin starts looking rough. In addition to this, they completely ignore white balance. Because of this, the wrong web ruins the skin tones. Another common mistake is using 10 presets on one photo. Instead, you should pick one style and stick to it. Finally, they export in low quality. Therefore, always export at 100% quality for Instagram and YouTube.tic.
Use Free Ultimate Cinematic Presets
🎁 Free Download
Get 200+ Cinematic Light-room Mobile Presets in 1 Click.
⬇️ Download 200+ Presets NowOnce you finish one edit, save it as a preset. Tap the 3 dots > Create Preset. Name it “Ultimate Cinematic Free 2026”. Check all boxes except Exposure and White Balance so it works on all photos. Now you can apply this preset to any photo in one tap. This saves hours. You can also download free deg presets from YouTube descriptions or trusted blogs. Import the deg file, open it in light-room, and save settings as preset. Always test the preset on 3 different photos before using it everywhere. Good presets should work on portraits and landscapes both. This is how creators edit 100 photos in 10 minutes.
However, most people make 5 big mistakes in cinematic editing. First of all, they over-saturate the colors. Keep in mind that Ultimate Cinematic means muted tones, not neon. Secondly, they use too much clarity. As a result, the skin starts looking rough. In addition to this, they completely ignore white balance. Because of this, the wrong web ruins the skin tones. Another common mistake is using 10 presets on one photo. Instead, you should pick one style and stick to it. Finally, they export in low quality. Therefore, always export at 100% quality for Instagram and YouTube.


