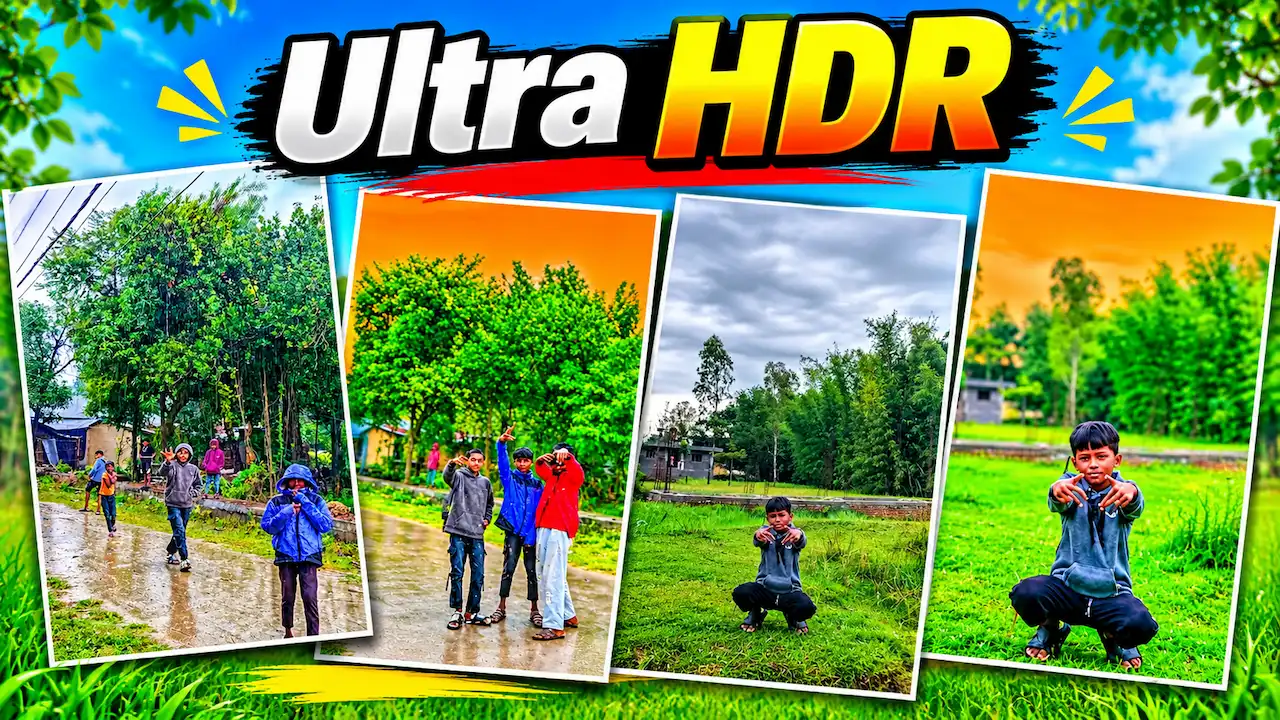
Learn how to edit Ultra HDR effect photo in mobile using PicsArt. In this tutorial, I will show you how to increase photo quality and create Ultra HDR effect.
Things You Need Before Starting
Before you start editing, you need a few things ready. First, you need a good photo taken in daylight. Outdoor photos work best for Ultra HDR effect. Second, you need PicsArt app installed from the Play Store. Make sure it is the latest version. Third, you need a little patience because good editing takes time. Do not use a blurry photo. The clearer your original photo is, the better the final result will be. Also, keep your phone charged and clear some storage for saving high-quality images.
PicsArt is one of the best and most easy photo editing apps for Android and iOS. It is free and has all the professional tools. You do not need to learn Photoshop to use PicsArt. It has tools like HDR, Curves, Saturation, and HD Portrait that are needed for Ultra HDR editing. The app works smoothly even on low-end phones. Millions of editors use PicsArt for this type of editing because it gives high-quality export without watermark. It also allows you to save the photo in full HD resolution for social media sharing.

Introduction to Ultra HDR Photo Editing
Learn how to edit Ultra HDR effect photo in mobile using PicsArt. In this tutorial, I will show you how to increase photo quality and create Ultra HDR effect. Today mobile photography is very popular and everyone wants their photos to look professional. Ultra HDR editing is the best method to make your normal photo look sharp, colorful, and high quality. This effect is now trending on Instagram and YouTube. With just one app like PicsArt, you can transform your photo completely. This guide will help you from start to end in a very easy way.
Ultra HDR effect is a special type of photo editing style where the details, colors, and sharpness of a photo are increased. In this effect, the green color of trees looks more green, the sky looks more blue, and the face looks more clear. It makes the photo look like it was taken with a DSLR camera. Many people think it needs a computer, but you can do it on your mobile phone. The main focus of this effect is on clarity and color enhancement. It is perfect for outdoor and nature photos where you want everything to pop out.

Importing Your Ultra HDR Photo in PicsArt
First, open the PicsArt app on your phone. Click on the plus button at the bottom center. Now select the photo you want to edit from your gallery. After selecting, the photo will open in the editing screen. Here you will see many tools at the bottom. Do not apply any filter directly. We will do manual editing for a better Ultra HDR look. Make sure to crop the photo if needed before starting. This step is very important because it sets the base for your entire editing process and improves the final quality.
Now we will increase the basic quality of the photo. Go to the Tools option and click on Adjust. Here you will find Brightness, Contrast, and Clarity. Slightly increase the Brightness to make the photo clear. Then increase the Contrast to around 10 to 20 percent. Most importantly, increase the Clarity to +30 or +40. This will make the details sharper. Do not overdo it, otherwise, the photo will look unnatural. This basic step is the foundation for the high-quality increase you want to achieve in your final image result.
Color Enhancement and Saturation
Now go to the Effects section and search for HDR. You will find different HDR options. Select the HDR effect that makes your photo look balanced. Keep the intensity of the HDR effect between 50 to 70 percent. If you apply it at 100 percent, the photo will look too artificial. The main purpose of HDR is to balance the light and dark areas of the photo. It will bring out the details from the shadows and highlights. This is the most important step for creating the Ultra HDR look you see in trending photos.
After HDR, we need to enhance the colors. Go to Adjust again and click on Saturation. Increase the saturation by +15 to +25. This will make the green grass and blue sky more vibrant. Then go to Hue and adjust the green and blue tones slightly. Go to Curves tool and select a little S-curve to add more depth to the photo. This color grading will give your photo that premium Ultra HDR feel. Remember, the key is to make it colorful but still look natural and not over-edited for the eyes.
HDR Editing
Ultra HDR Skin Tone and Face Retouch
If your photo has people in it, you need to be careful about skin tone. Do not increase too much saturation on the face. Use the Retouch tool in PicsArt. Select the skin smoothing option and keep it very low. Then use the Details tool to make the face a little sharper. You can also use the Whiten tool for teeth if needed. The goal is to keep the person looking natural while the background looks Ultra HDR. This balance between subject and background is what makes professional editing different from normal editing work.
To make your photo look more professional, you can add a slight focus effect. Go to Effects and find Blur. Use the Blur tool and apply it lightly on the background, not on the main subject. This will make the main person pop out more. Alternatively, you can use the Depth effect to create a DSLR-like look. This step is optional but it helps to increase the overall quality and attention on the subject. A clean background with sharp focus always looks more high quality on Instagram and other platforms.
Ultra HDR Adding Sharpness and Details
In fact, this step is for the final high-quality increase. First of all, go to Tools and then click on Sharpen. After that, increase the sharpening to around +30. Because of this, every small detail like leaves, clothes, and hair will become more visible. Moreover, you should also go to Details and increase it slightly. However, be careful not to add too much noise. Therefore, after sharpening, zoom in and check if the photo still looks clean. If you see grain, then reduce the sharpening a little. Finally, this step ensures your photo looks Ultra HD when you post it online or print it.
Saving is the most important part. Many people edit well but save in low quality. In PicsArt, after editing, click on the arrow at the top right. Before saving, make sure you select the best quality. Click on Save and then choose the highest resolution available. Do not take a screenshot of the edited photo, always save it directly. This will keep the photo in full HD. A well-saved Ultra HDR photo can be used as wallpaper or for printing without losing its quality and details.


