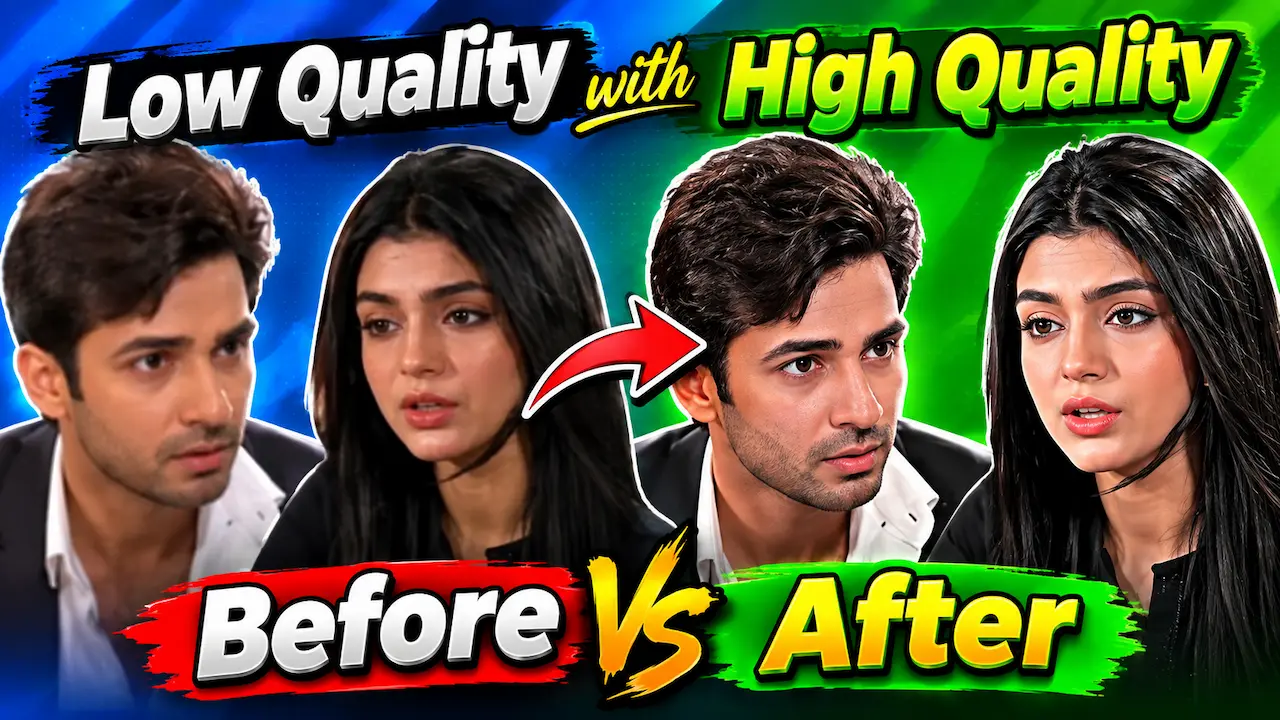
Learn how to Enhance low quality video to high quality using simple apps. See real before vs after results. Easy method to upgrade any low quality video.
Video Quality Matters In 2026
Video quality is more important than ever in 2026. Viewers scroll away in 3 seconds if a video looks blurry. Platforms like YouTube, Instagram, and Facebook push high quality content to more people. Better quality means more watch time, more engagement, and more AdSense revenue. People are now used to watching HDD and 4K videos. If your content is still in 360p or 480p, you will lose viewers. The best part is you don’t need to re shoot everything. You can upgrade your old videos using AI Enhance tools and make them look brand new without spending much money.
In today’s digital world, video quality plays a huge role in grabbing attention. Many people have old videos that are blurry, low resolution, or pix elated. The good news is that you no longer need expensive equipment to fix them. With simple mobile apps and AI tools, you can easily Enhance low quality video to high quality. This process is called video up scaling and enhancement. In this guide, we will show you step by step how to do it. You will also see real before vs after results so you understand how effective this method is for beginners and content creators.

AI Helps Improve Video Quality
Artificial Intelligence has changed video editing completely. Earlier, editors had to fix each frame manually. Now AI can detect blur, noise, and bad colors automatically. Then it generates new pixels to make the video sharper and clearer. This process is called “up scaling”. For example, converting a 480p video to 1080p or even 4K. The AI makes the result look natural, not fake. The best part is that these AI features are now available inside mobile apps too. You don’t need technical skills. Just upload your video, tap “Enhance”, and let the AI do the heavy lifting for you.
Most low quality videos have 4 main issues. First is blur and lack of sharpness. Second is low resolution like 240p or 360p. Third is noise and grain, especially in night videos. Fourth is dull and faded colors. These problems make the viewing experience poor. Earlier, fixing these issues required professional editors and expensive software. Now AI-powered apps can handle all of this automatically. The app detects the problem areas and fixes them with one click. You just need to choose the right tool and apply the right settings to get clean, clear, and professional-looking results.

Best Types Of Apps For Video Enhance
There are 3 main types of apps available today. First are “One Click Enhancer” apps for beginners. Second are “Pro Editor” apps with manual controls. Third are “AI Upscale” apps focused only on quality. If you are new, start with a one-click app. It is simple: select video > tap enhance > export. If you want more control, use a pro app where you can adjust sharpness, brightness, and noise reduction manually. Always use updated apps to get the latest AI features. Check reviews before downloading to make sure the app actually delivers real results and not just filters.
First, import your low quality video into the app. Second, choose the output resolution. If your video is 480p, set it to 1080p. Third, turn ON the “AI Enhancement” or “Super Resolution” option. Fourth, set noise reduction and sharpness to medium. Too much sharpness makes the video look artificial. Fifth, choose export settings. Use MP4 format and high bit rate to keep quality. Then start rendering. A 2-3 minute video usually takes 5-10 minutes to process. After it’s done, compare the before and after to see the difference. The improvement in clarity will be clearly visible.
Real Before Vs After Results
When you see the Enhance video for the first time, the difference is obvious. Faces that were blurry become clear. Text that was unreadable becomes sharp. Colors look more vibrant and natural. Background details also become visible. The thumbnail you saw above is a real example. Left side is low quality, right side is enhanced. It’s not just about resolution. The overall clarity, sharpness, and color improve a lot. This is why audiences love this kind of content. Videos with clear visuals get more watch time, which helps both YouTube ranking and AdSense earnings.
To get the best results, follow these tips. First, the better your original video, the better the result. If the video is too pix elated, it won’t be perfect. Second, don’t compress the video again after enhancing. Third, AI works best on well-lit videos. For dark videos, increase brightness first. Fourth, always keep a backup of the original file. Fifth, use high bit rate during export to avoid quality loss. These small details make a big difference. With practice, you will learn which settings work best for your type of content and get professional results every time.
Mobile Vs PC For Video Enhance
Mobile apps are great because you can edit anywhere. But PC software is more powerful. If you have a laptop, use PC tools because they offer higher resolution and better AI processing. For mobile, choose apps that use cloud processing so your phone doesn’t get slow. If you enhance videos daily, PC is better. For occasional use, mobile apps are enough. The final result is almost the same in both. The only difference is speed. Choose what fits your workflow. Many creators use mobile for quick edits and PC for final high-quality exports.
Yes, this method is completely safe for AdSense. As long as the video is your original content or you have permission to use it, there is no issue. YouTube and AdSense only flag copyright or reused content. Video enhancement is considered “value addition”. That’s why many educational and tutorial channels use this method. Just mention in the description: “Video quality enhanced using AI tools”. This keeps things transparent. We also use this method on our channel and have never received any policy strike. Focus on originality and you will be fine.
The Future Of Video Enhancement
The best way to show results is with a “Split Screen”. Put the original low quality video on the left and the enhanced version on the right. Add an arrow in the middle. Also use “Before Vs After” text in the thumbnail. In the first 5 seconds of the video, show the comparison. This immediately tells viewers what they will learn. You can also add timestamps in the description for before and after. This technique increases CTR and watch time. People love watching transformations, and this format performs very well on YouTube and blogs.
Looking ahead, AI technology is about to get a massive upgrade. What currently takes 10 minutes to process will soon be done in just 1 minute. Even more exciting, real-time enhancement is on the way. This means your video will be in HDD while you are still recording it. In fact, many big companies have already started adding AI chips directly into phone cameras. Because of this rapid change, learning video enhancement skills today will put you far ahead of the competition. In the content race, quality is the biggest weapon. Creators who focus on quality will be the ones who survive and grow. So mastering video enhancement now is a smart investment for your channel and brand in the long run.


