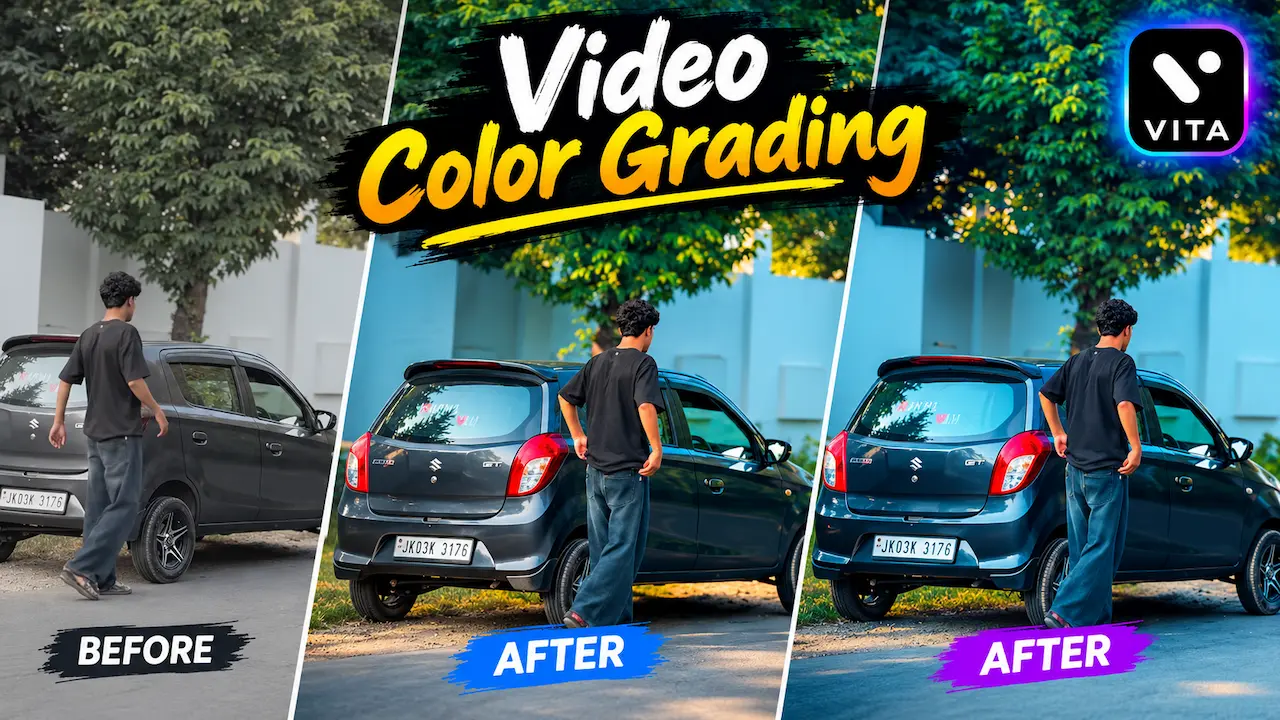
Download best Video Color Grading App and make your normal video cinematic. Easy VITA app tutorial for color grading on mobile.
Choose VITA App for Color Grading
There are many video editing apps, but VITA is special for beginners and professionals. The app is completely free and has no watermark on exported videos. It offers advanced color grading tools that are usually only found in expensive desktop software like Adobe Premiere Pro. VITA has pre-made cinematic LUTs, filters, brightness, contrast, saturation, temperature, and HSL controls. Its interface is very simple. Even if you have never edited a video before, you can achieve a professional result in just one click with VITA.
In today’s digital world, everyone wants their videos to look professional and cinematic. A normal video shot on a mobile phone can be transformed into a stunning visual story with the right color grading. This is where the VITA app comes in. It is one of the most powerful and easy-to-use video editing apps available for Android and iOS. If you want to make your content stand out on Instagram, YouTube, or TikTok, learning color grading is essential. This guide will show you how to download the best app and use it.

VITA App Download – Safe and Official
To ensure safety, you should always download the VITA app from the official source. For Android users, go to the Google Play Store and search for “VITA – Video Editor & Maker”. For iPhone users, go to the Apple App Store. The official app is developed by SNOW, Inc. and has over 100 million downloads. Avoid downloading APK files from unknown websites as they may contain viruses. The app size is only around 150MB and works smoothly on most modern smartphones. Installation takes less than a minute.
Once you have installed the app, open it and tap on the “New Project” button. Your phone’s gallery will open. Select the normal video you want to make cinematic. The video in your thumbnail is a perfect example of a raw clip that needs color. After selecting, tap the check mark. Your video will be imported to the timeline. VITA supports all video formats including 4K. You can trim your video if needed before starting the color grading process to save time and get precise results.

Understanding the Color Grading BEFORE Look
Your BEFORE image shows a common problem with smartphone videos. The colors are washed out, the image looks gray, and there is no depth. The green of the trees is not vibrant, and the car’s color looks dull. This happens because phone cameras shoot in a flat profile to preserve details. This flat look is actually good for editing because it gives you more data to work with. Do not worry if your video looks like the BEFORE shot. It is the perfect starting point for a dramatic cinematic transformation.
The fastest way to make your video cinematic is by using VITA’s filters. In the bottom menu, you will find the “Filter” option. Inside, there is a category called “Cinematic” or “Movie”. These are LUTs created by professionals. Just tap on a filter to apply it. You can adjust the intensity of the filter from 0 to 100 using the slider. For the look in your AFTER thumbnail, use a filter that enhances blues and greens. This instantly changes the mood of your video from amateur to professional quality.
Manual Color Grading – Adjust Settings
For full control, you should use the “Adjust” tool. This is where real magic happens. Here you will find tools like Brightness, Contrast, Saturation, Temperature, and Sharpness. To get the AFTER look from your thumbnail, first increase the Contrast slightly to add depth. Then increase Saturation to make the car and trees pop. Next, lower the Temperature a bit to get that cool, teal and orange cinematic look. Finally, increase Sharpness to make details crisp and clear.
HSL stands for Hue, Saturation, and Luminance. This is a pro-level tool inside VITA that allows you to change a specific color only. For example, in your thumbnail, the green trees in the AFTER image look much more vibrant. You can select the Green color in HSL and increase its saturation and luminance. You can also change the blue of the sky to be more cyan. This selective color control is what separates a basic edit from a true cinematic color grade that looks like a big-budget film.
Adding the Final Cinematic Touch
After color grading, you can add a few more effects to make it even more cinematic. Go to the “Effects” section and add a subtle vignette, which darkens the corners of the video and focuses attention on the center. You can also add a slight film grain for a vintage movie look. Do not overdo these effects. A good color grade is always subtle. The goal is to make it look natural but enhanced. The two AFTER images in your thumbnail show a balanced, professional final look.
Once you are happy with your color grading, it is time to export. Tap the export button on the top right. VITA allows you to export in up to 4K resolution at 60fps. For best quality for YouTube and Instagram, choose 1080p Full HD and high bitrate. Make sure the frame rate is same as your original video. The export process is very fast. The app will save your cinematic video directly to your gallery without losing any quality or adding a watermark, which is a huge advantage.
Before vs After – The Real Difference Color Grading
The power of color grading is clear in your thumbnail comparison. The BEFORE video is dull, flat, and boring. Nobody would watch it for long. The AFTER videos are eye-catching, colorful, and professional. The car looks glossy, the trees look lush, and the overall scene has depth and emotion. This transformation is why color grading is the most important step in video editing. A good grade can make even a simple video shot on a low-budget phone look like it was shot on an expensive cinema camera.
To get the best results, therefore, always shoot your video in good natural light. For instance, try to shoot during golden hour, which is early morning or late evening. Moreover, avoid using your phone’s built-in filters while shooting. In addition, keep your phone stable by using a tripod. However, when color grading, remember that less is more. For example, do not increase saturation too much because your video will look unnatural. Finally, watch popular movies and try to replicate their color style. Consequently, if you practice regularly with VITA, you will quickly develop your own unique cinematic style.


